1. System Requirements
For the Advanced Heading for Elementor plugin, you should install the latest version of the Elementor page builder.
2. Installation
To install this plugin you must have a working version of WordPress already installed. Upon downloading the Advanced Heading for Elementor archive, extract the archive, and inside the extracted folder you will find the full contents of your purchase. The advanced-heading-for-elementor.zip archive contains the installable plugin files.
You can install the plugin in two ways: using the WordPress plugin installer, or the FTP upload method. If you have trouble installing the plugin using the WordPress plugin installer, please proceed with installing it via the FTP upload method and you will be able to get around the issue.
1. WordPress Plugin Installer
Follow the steps below to install using the WordPress plugin installer.
- Navigate to Plugins > Add New
- Click Upload Plugin and then Choose the advanced-heading-for-elementor.zip from your computer then click on the Install Now button.
- To activate the newly installed plugin navigate the Plugins > Installed Plugins.
- Find the Advanced Heading for Elementor plugin from the list and press/click Activate.
- That’s it. Now the plugin is fully installed and activated on your website.
2. FTP Upload Method
Follow these steps to install the plugin using FTP.
- Unzip the advanced-heading-for-elementor.zip archive file to the desired location on your computer. The extracted files will be uploaded later via FTP.
- Connect to your server via FTP.
- Navigate to /wp-content/plugins/ on server.
- Upload local folder advanced-heading-for-elementor to remote /wp-content/plugins/ folder.
- To activate the newly installed plugin navigate the Plugins > Installed Plugins.
3. How to Use
In this add-on, you will find two widgets inside the Advanced Heading category. Let’s how you can use these widgets.
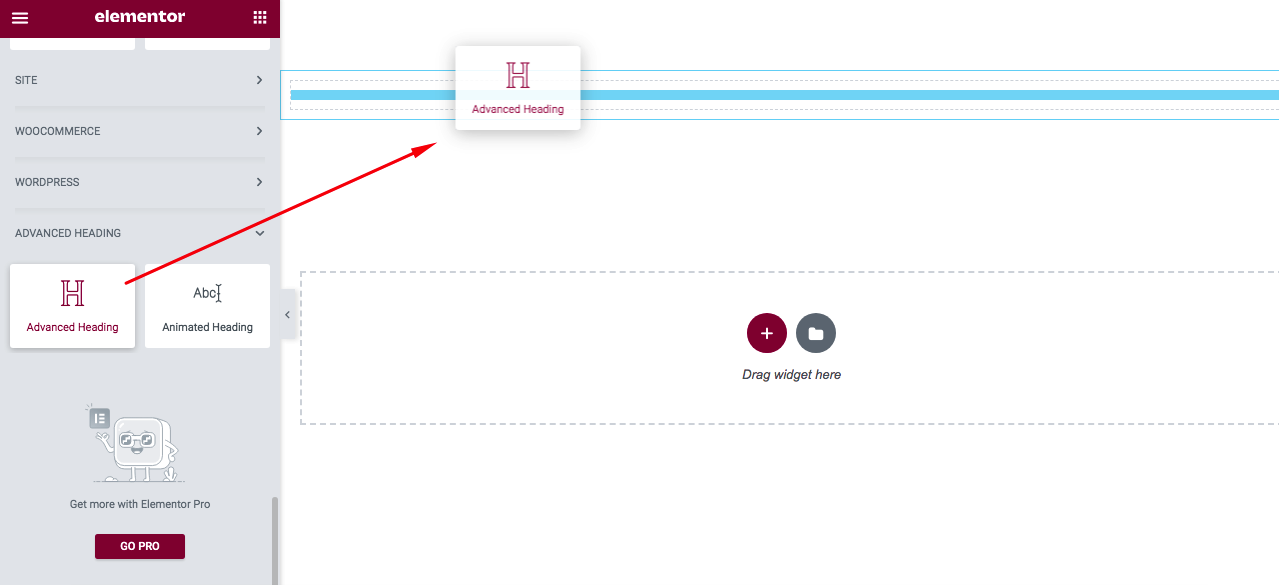
1. Advanced Heading
You can make nice looking section heading using this heading widget. Just drag and drop the widget in the Elementor content editor to use it.
After the drag and drop the widget you will find so many options to customize your Advanced Heading widget. The first option is in the content tab to enter your heading text.
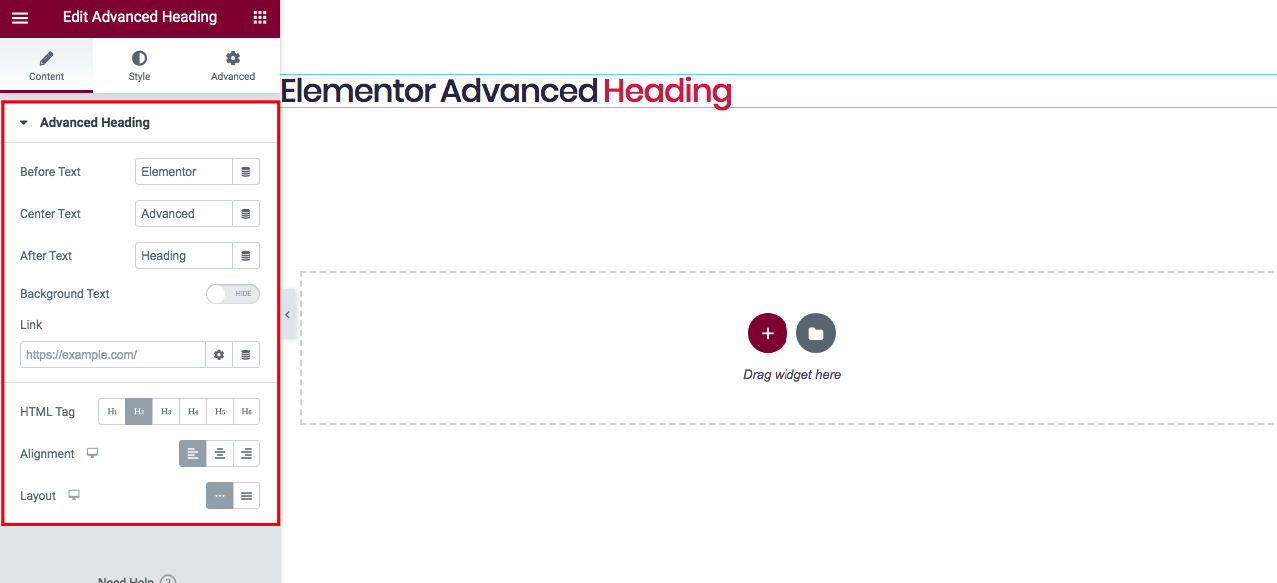
You can customize typography, color, and spacing from the style tab. In the style tab, you will find Before Text style, Center Text style, After Text style, Custom Border style, and Background Text style.
Also, you can import our pre-made styled Advanced Headings. Just import the JSON file using Elementor local template importer. You will find the JSON file inside the Pre-Made templates/Advanced Heading folder.
2. Animated Heading
You can use an animated heading using this widget. Just drag and drop the widget like the Advanced Heading widget. After drag and drop the widget you will see look like this screen.
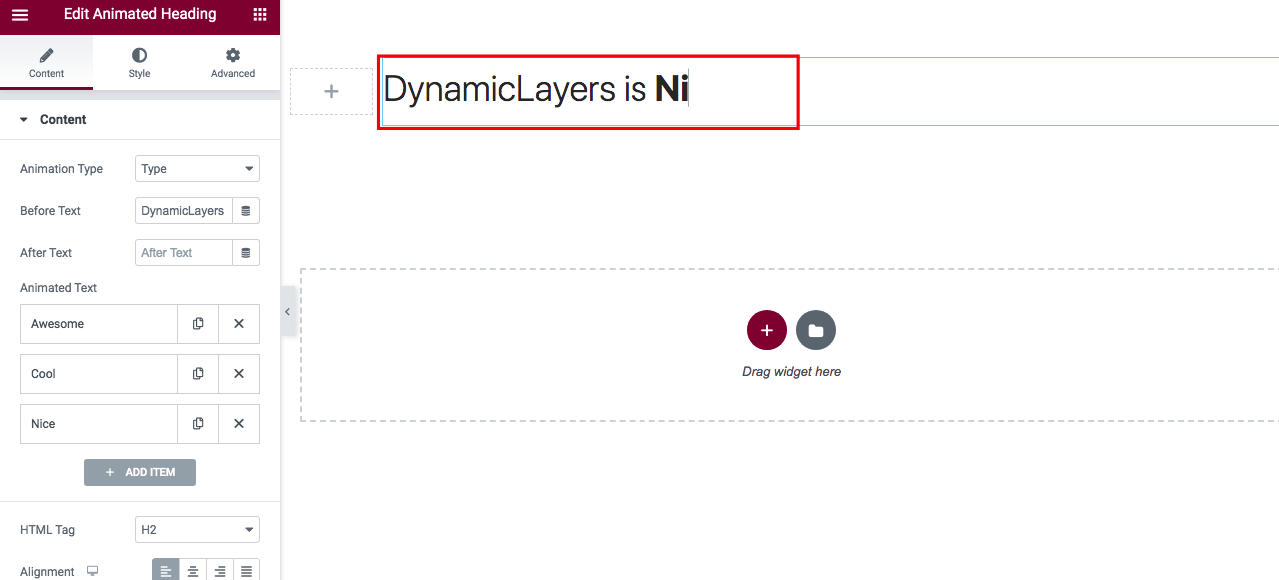
In the content area, you can select animation type, and add animated text before and after text. Also, you can select the tag and alignment of the heading.
Also, you can import our pre-made styled Animated Headings. Just import the JSON file using Elementor local template importer. You will find the JSON file inside the Pre-Made templates/Animated Heading folder.